Having successfully implemented OAuth in a recent project I thought I would blog about my experience in getting everything configured.
Thanks first of all to this most excellent of videos from Scott Hanselman which provides a fantastic step by step guide on configuring OAuth in ASP.Net
What is OAuth?
Lifted directly from the OAuth Community Site:
An open protocol to allow secure authorization in a simple and standard method from web, mobile and desktop applications.
For you as a developer this means that you gain limited access to a third party application’s services and may use those services within your own site. For the purposes of this post that means you can leverage third party authentication services for use within your site.
Why is it useful?
Think about it. Do you really want another username and password to remember? You’ve probably got a grocery list of them already so wouldn’t it be nice to just be able to log in to your favourite sites using just your Twitter, Facebook, Gmail, or whatever, account?
Don’t get me wrong, there’s nothing wrong with going with the classic site registration of username and password but it’s so little hassle to provide this alternative to your users that, to me, it’s a no brainer.
In fact with the template provided in ASP.Net you can allow users who register with an alternate account to create a local password for your site if they want to, giving the best of both worlds, and that all important convenience and flexibility to your users.
Okay, I’m convinced, show me how
Create the Project
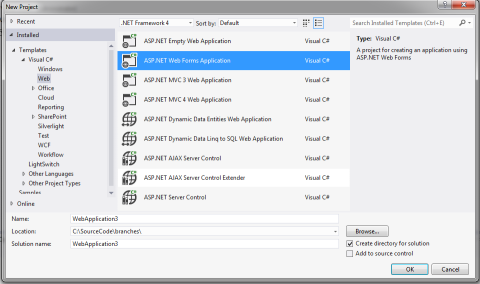
Here goes. First off open up a new Visual Studio 2012 web forms project
Notice over on the right under the App_Start folder there’s a file called AuthConfig.cs.
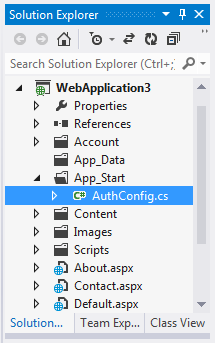
Open this up and you’ll see a bunch of commented out code which shows you that you can set up Twitter, Facebook, Microsoft and Google just by filling in the authentication keys and secrets.

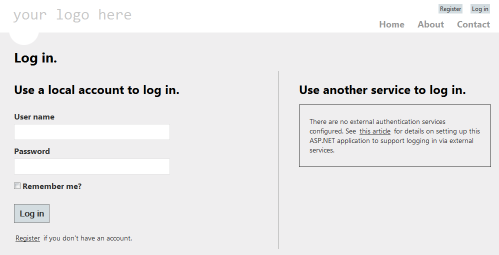
If you run the application as it stands and go to the Login page you’ll see that you’ve got the standard membership features already configured but notice that there’s a new section with the heading Use another service to log in. This is the OAuth area which we’ll configure in the next couple of steps.
Okay so back to AuthConfig.cs. It’s time to fill in the blanks.
Register Your Application
First things first you’ll need to register your application with the services you want to use:
- Go to the Twitter developer’s site at : https://dev.twitter.com/apps (main site is at https://dev.twitter.com)
- Sign in with your Twitter account (or create one if you don’t already have one)
- Click on the Create a new Application button
- On the Create an application form, fill in the name of your application, give it a description, provide a link to your application’s home page (e.g. http://myapplication.com), and provide a callback url. This is the url that Twitter will redirect your users to after they have logged into Twitter (e.g. http;//myapplication.com/myaccount)
- Accept the terms and pass the Captcha test
- Click on the Create your Twitter application button
- You’ll then be taken to the My Applications page. From here:
- Choose the application you created
- On the Details tab, scroll to the bottom and choose the Create My Access Token button
- Still on the Details tab, copy the Consumer Key and Consumer Secret values for your application
- Return to your application and open up the AuthConfig.cs file
- Uncomment the Twitter section
- Then paste Consumer Key and Consumer Secret values into the consumerKey and consumerSecret parameters respectively
- Go to the Facebook developer’s site at: https://developers.facebook.com/apps
- Log in and register as a developer if you haven’t already done so
- Click on the Create New App button
- Fill in the details about your app
- On the app screen, enter in your App Domain e.g. myapplication.com
- Under the Select how your app integrates with Facebook section select Website with Facebook Login, then enter your site url e.g. http://myapplication.com
- Hit Save Changes then take a note of your App ID and App Secret
- Return to your application and open up the AuthConfig.cs file
- Uncomment the Facebook section
- Then paste your App ID and App Secret into the appId and appSecret parameters
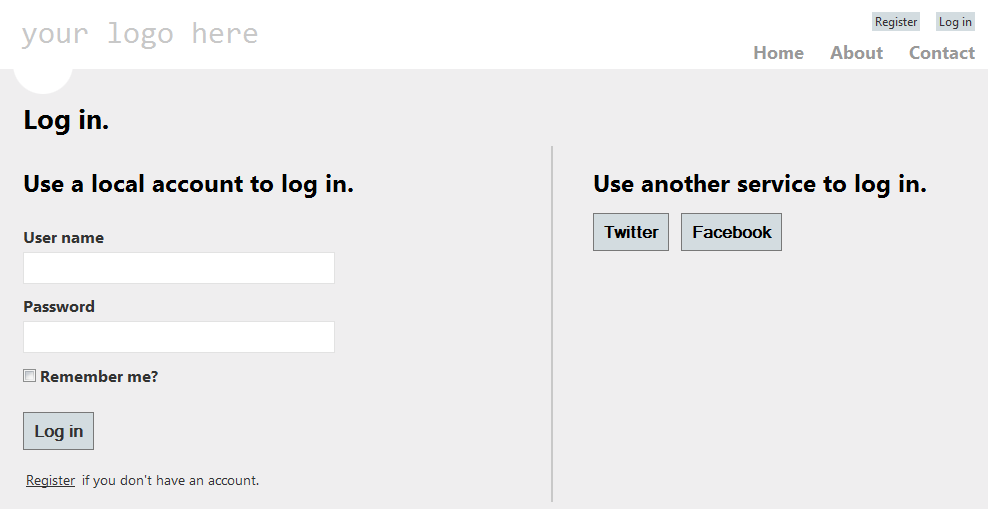
Once you’ve done this, fire up your application again, go to the Login page, and note that you’ve now got a couple of buttons allowing you to log in via Twitter and Facebook.